

What is a Workspace?
Workspaces is a section of the involve.ai platform that allows users to take notes, plan actions, and track tasks in a collaborative, transparent way. Learn more about workspaces’ purpose.
Create a Workspace
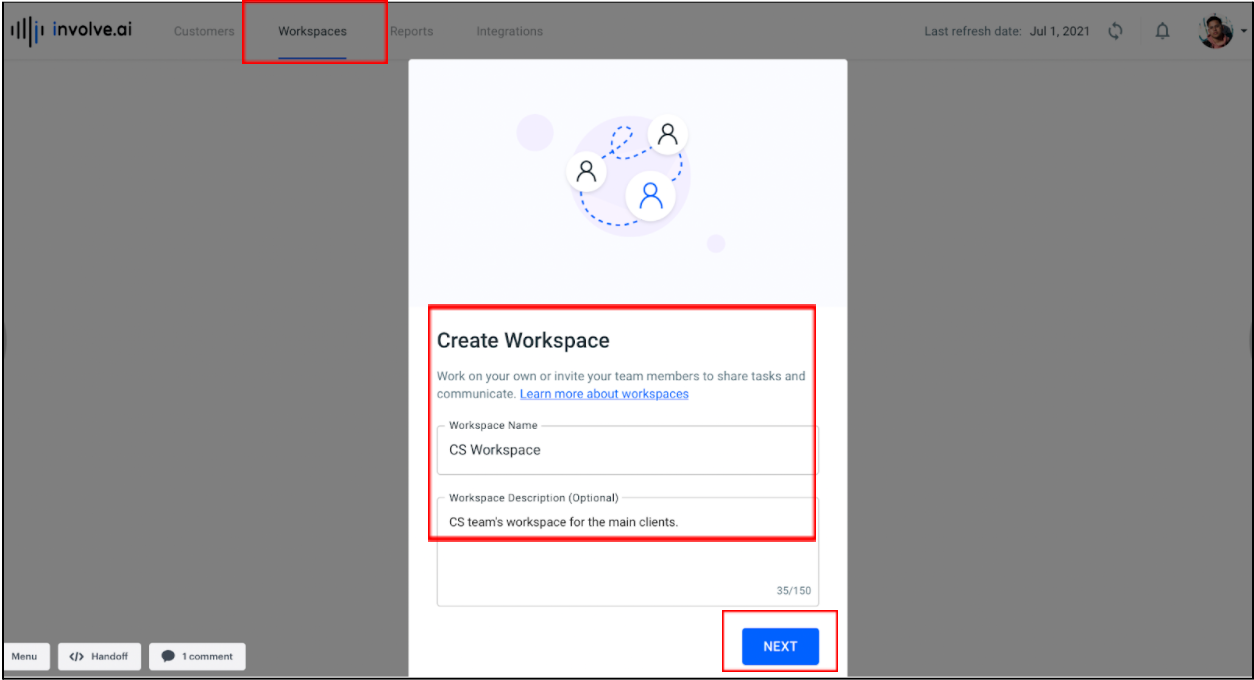
Log into your involve.ai platform. Select the Workspaces tab at the top of the screen.
If this is your first time using Workspaces, you will be prompted to Create Workspace and can enter a Workspace name and description. Then Click Next.
If you have used Workspaces, and want to create a new one, you will not see the prompt automatically. Instead, click the drop down menu in the upper left to see a list of all Workspaces available to you, and select Add New… to open the prompt window.
You can choose to Invite other users to the Workspace, or skip this step if you are making a private Workspace.
- When inviting users already on the platform, relevant options will pop up to select from.
- You can choose to REMOVE users from the Workspace by hovering over the email address and clicking remove.
- Click Create.
You can create as many Workspaces as you need, and involve.ai has created a number of Workspace Templates to help you use them in particular ways.
Set up and use your Workspaces
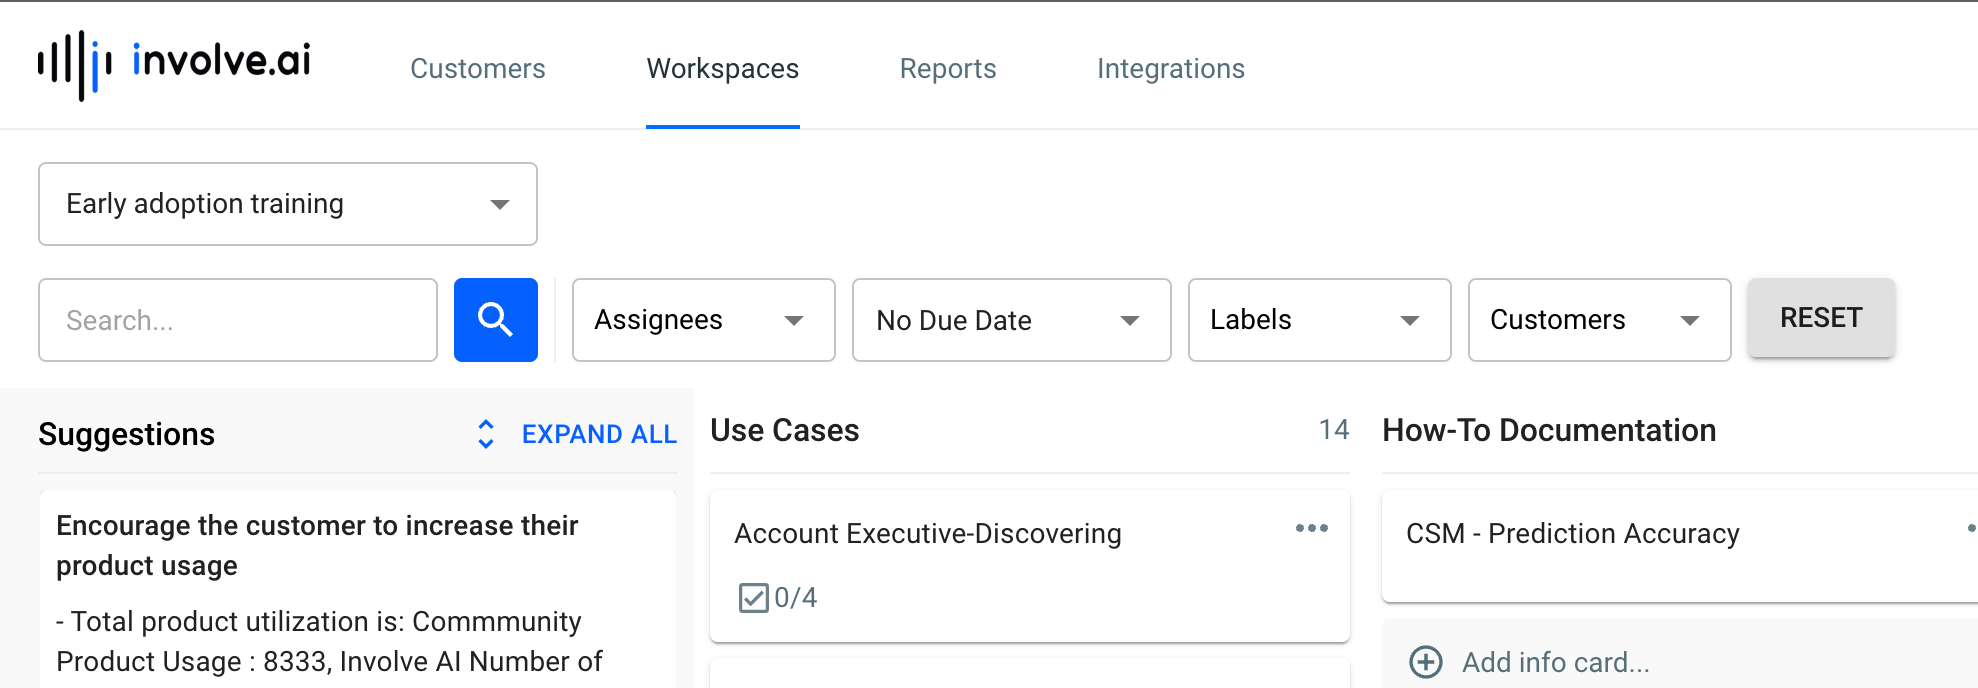
Navigating Workspaces
Once you have a Workspace named and created, you’ll see that there are a few main sections:
- Search and Filter bar across the top to help you quickly find tasks or notes.
- Suggestions, listed to the left of the screen, recommend actions to take on behalf of specific customers.
- The project board to the right is a series of columns that allows you to organize Info cards, cards that contain notes and tasks, in a way that keeps your team on track.
Suggestions
Once you create a Workspace, Suggestions will auto-load on the left side of the screen and will continue to automatically populate for all accounts owned by you.
Suggestions are actions identified by involve.ai’s machine learning models as most likely to positively impact your customers’ health. You can choose to convert suggestions into actions by hovering over the suggestion card and selecting from the X or → options.
- Select the → to convert the suggestion card into an info card that appears in your project board. Edit or add to the Suggestion and then select Save.
- Select X to disregard the suggestion.
Project Board
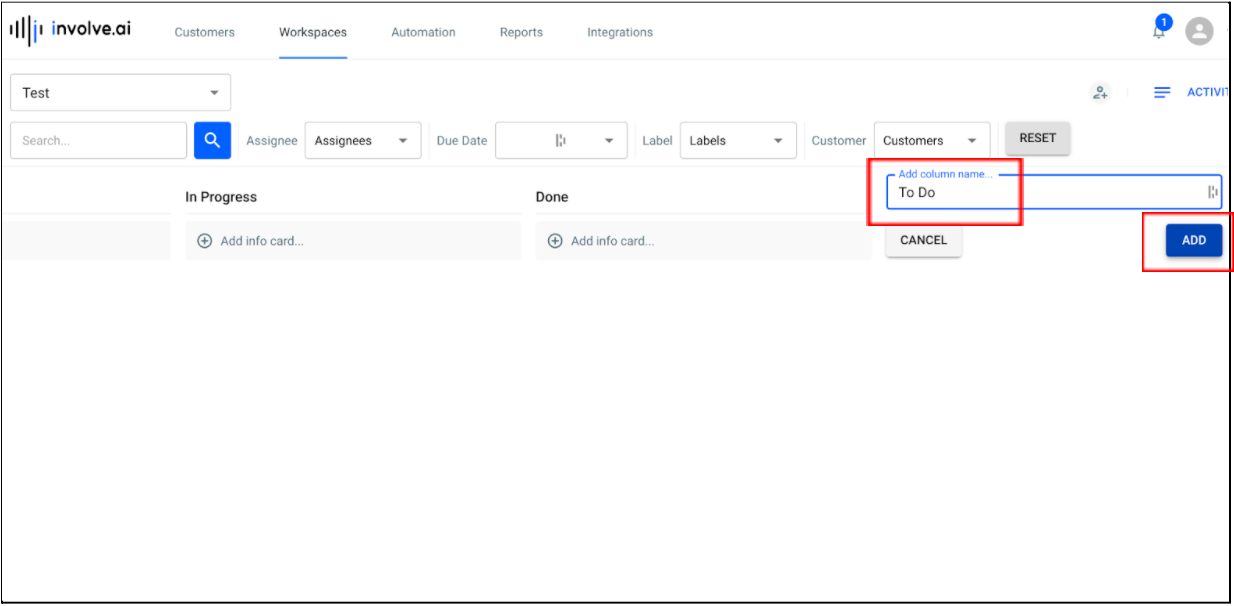
The columns and cards in your Workspace project board are fully customizable. Click on any of the column headers to change the name and purpose of the columns, and add a new column by scrolling to the far right. Click on +Add Column, name your new column, and click Add.
Within each column you can create Info cards from scratch by selecting +Add info card. Within a new card, add a title, note(s), and to-dos (along with due dates and owners).

To move an info cards from one column to another (for example, from In-Progress to Done), simply click on the card you want to move and hold while you drag and drop the info card into the new column.
Search and filter in Workspaces
You have the ability to filter by Assignee, Due Date, Label, and/or Customer.
- Assignee includes all workspace members who have been assigned info cards or checklist items in the workspace.
- Due date includes the option to filter based on Custom Due Dates.
- Labels will auto-populate from the list of labels created by all workspace members for their info cards.
- Customer includes:
- With user permission, all customers you own.
- With admin permission, all customers within the workspace.
Track activity
All actions taken within a workspace are tracked. To view past activity, select Activity in the upper right corner.