
Some organizations love the unification and visibility of involve.ai’s dashboard, but prefer to keep their account and CS teams using a different system of action (for example, Salesforce or Gainsight), rather than having them use Workspaces. We are happy to support whatever process works best for you! If your organization does want to write involve.ai data back into a system of action, this is the process you will follow.
Step 1: Let us know!
Discuss your use case with your Customer Success Manager and Data Science Consultant so they can fully understand your goals and provide appropriate guidance throughout the process.
Step 2: Ensure involve.ai has access to your credentials
Provide involve.ai with credentials to access your data. Some organizations create a service account for involve.ai while others prefer to provide their personal credentials.
Step 3: Identify the fields that you want written back
Determine which specific involve.ai information you want written back to your system of action. We will need a unique identifier for each data type (such as Account ID), and we recommend writing back the current timestamp.
Step 4: Fill in the write-back schema
A schema is a type of framework that we use to help with data mapping. We will provide you with a schema* that showcases source field names and data types. The unique identifier will be bold. Unless otherwise specified, we will request one write-back schema for every source. For example, if your organization plans to write back the health score and the workspace recommendations, you will receive one schema naming the source fields from each collection.
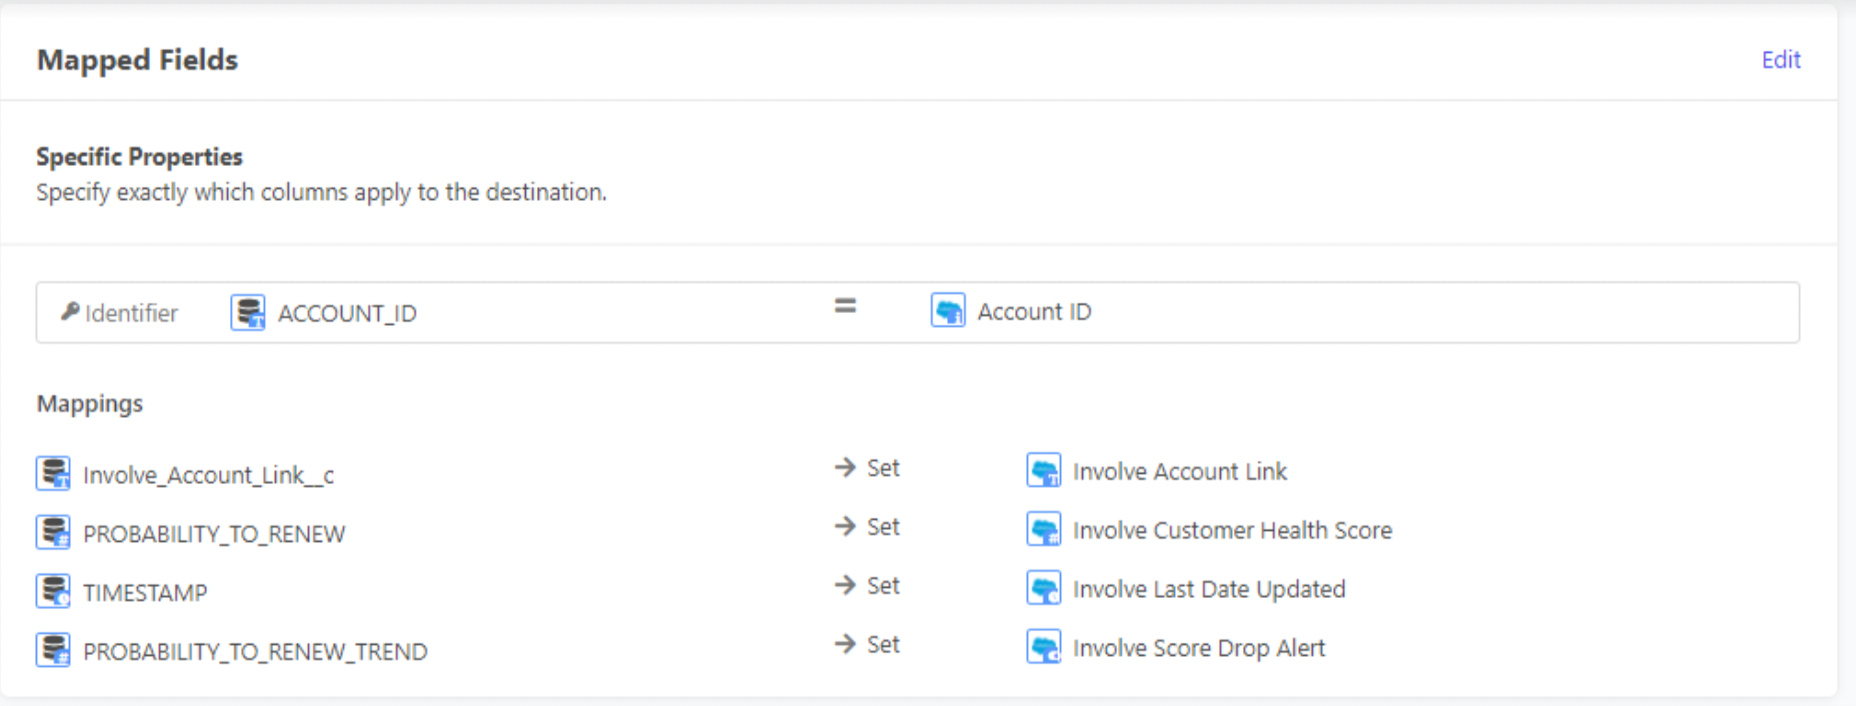
Step 5: Determine the destination location, fields, and write-back cadence
- Destination Location - Specify which database and which table to write back to. This is often formatted like “DATABASE”.”TABLE”
- Destination fields/columns - Specify which fields to write each source column to. We require a destination field that corresponds exactly with each source field.
- Configuration Policies - You may wish to specify configurations, such as matching rules or batch size. Matching rules specify the relationship between source data and destination tables. Our default setting is “Update Only”. If you specify a batch size, we can update accordingly to reflect your specifications. Setting a batch size impacts sync performance. Smaller batch sizes will use more API calls and cause the sync to run slower.
- Write-back cadence - Specify how frequently you would like information to be written back to the destination. Most organizations choose a daily or weekly cadence. It is entirely custom and we can specify down to the timestamp. We do recommend that the cadence correspond to the automation cadence for dashboard updates. For example, if your dashboard automation runs weekly, we should execute the write back no more than weekly, some time after the dashboard update executes.
Step 6: Configure and test the write-back
Once all of the above is complete, we will set up the write-back and test with a single record to ensure success. Congratulations on your new process!
*We use A Free Database Designer for Developers and Analysts to generate the schema.