What is a User Role?
User roles allow admins to add users to the involve.ai platform and to adjust user permissions. There are two user roles: Admin and User.
Users
Users have the ability to use the dashboard, insights, reports, and integrations within the permissions defined by an admin.
Admins
Admins have full permissions on the system, including the ability to see all customer details and add other users or admins to the platform.
Note: Only admins can add users to the system.
Where are User Roles?
- Click on the down arrow next to the profile photo in the upper right corner of the involve.ai page.
- A drop down menu will appear. Select Settings.
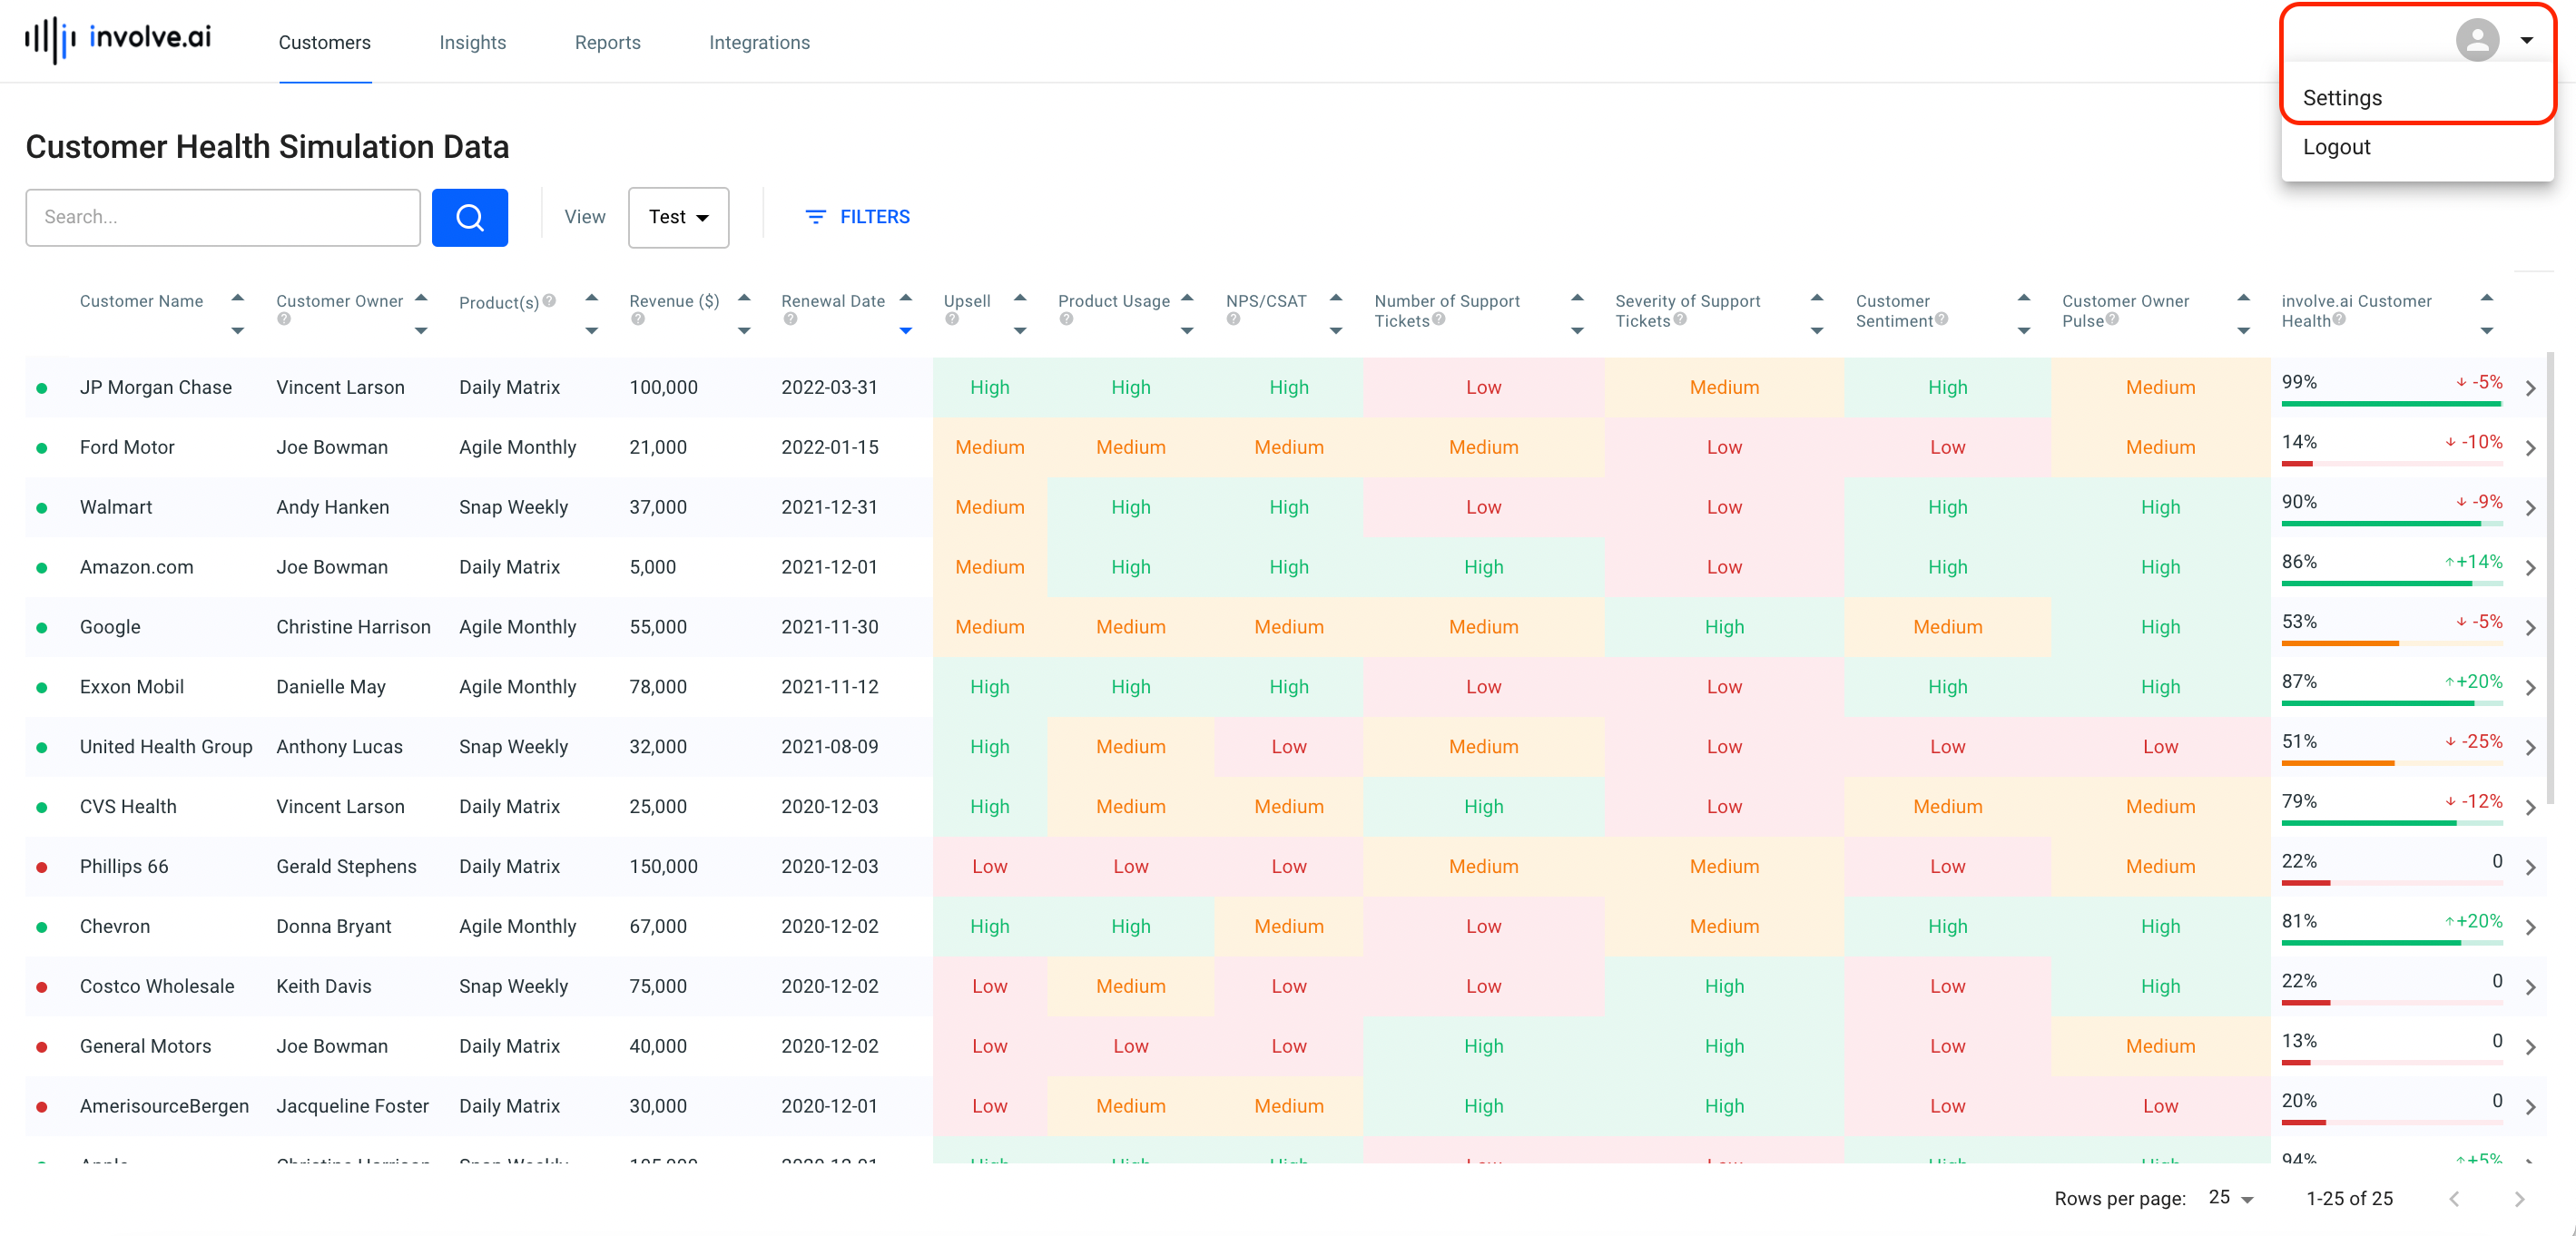
- On the Settings window, click on User & Roles
Add a User or Admin
Note: Only Admins can add other Admins or Users to the system.
- On the User & Roles page, click on the Invite Users button in the upper right corner
- A pop-up window will appear. In the text box, add in the email address(es) of the individual(s) you are adding to the system. Press the return / enter key or add a "," after each email address entered. When finished, click on the Add button. You will be routed to the Assign Roles and Permissions to New Users page.
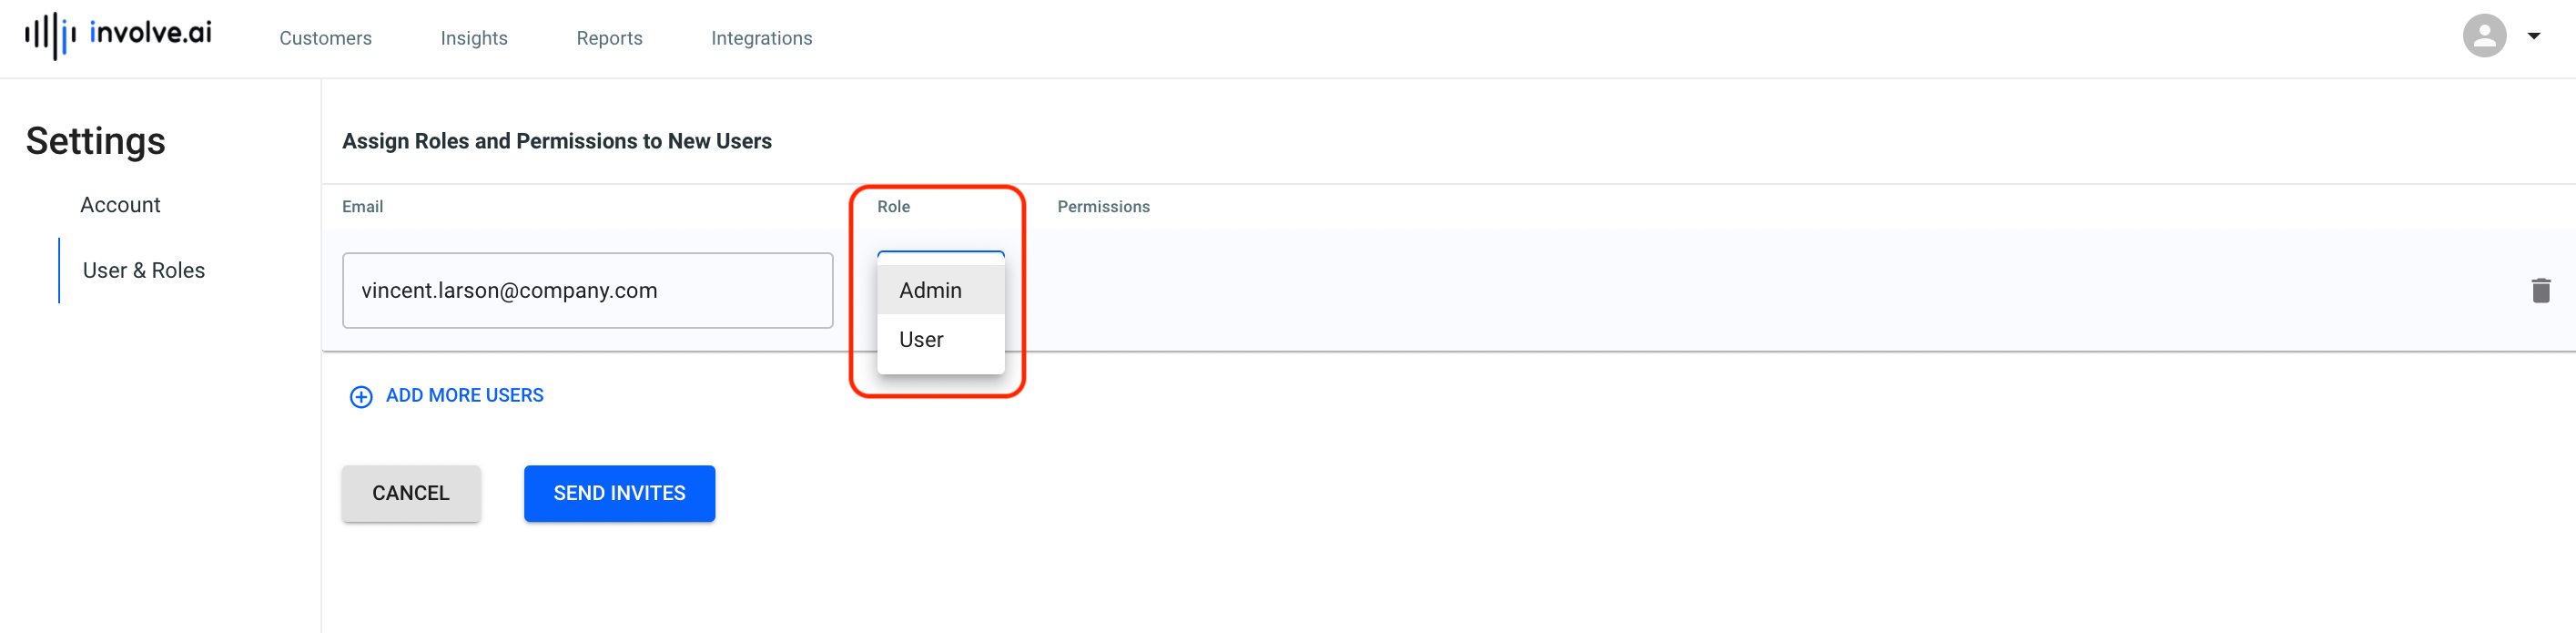
- Here you can assign a role to each user:
- If the role is Admin, skip to step 6.
- If the role is User, continue to step 4.
- Admins can restrict user permissions based on several categories. From the dropdown or ranges, select the fields that should be viewable for the user (for example, if the Customer Owner is restricted to only Vincent Larson, the user will only see accounts with Vincent Larson as the Customer Owner). Please note that involve.ai's email alerts follow these user permissions as well; if a user wants to receive notifications on their accounts only, they should leverage user permissions rather than views.
User roles can have one or multiple restriction categories, as follows:- Customer Name
- Customer Owner (most common)
- Product(s)
- Revenue Range
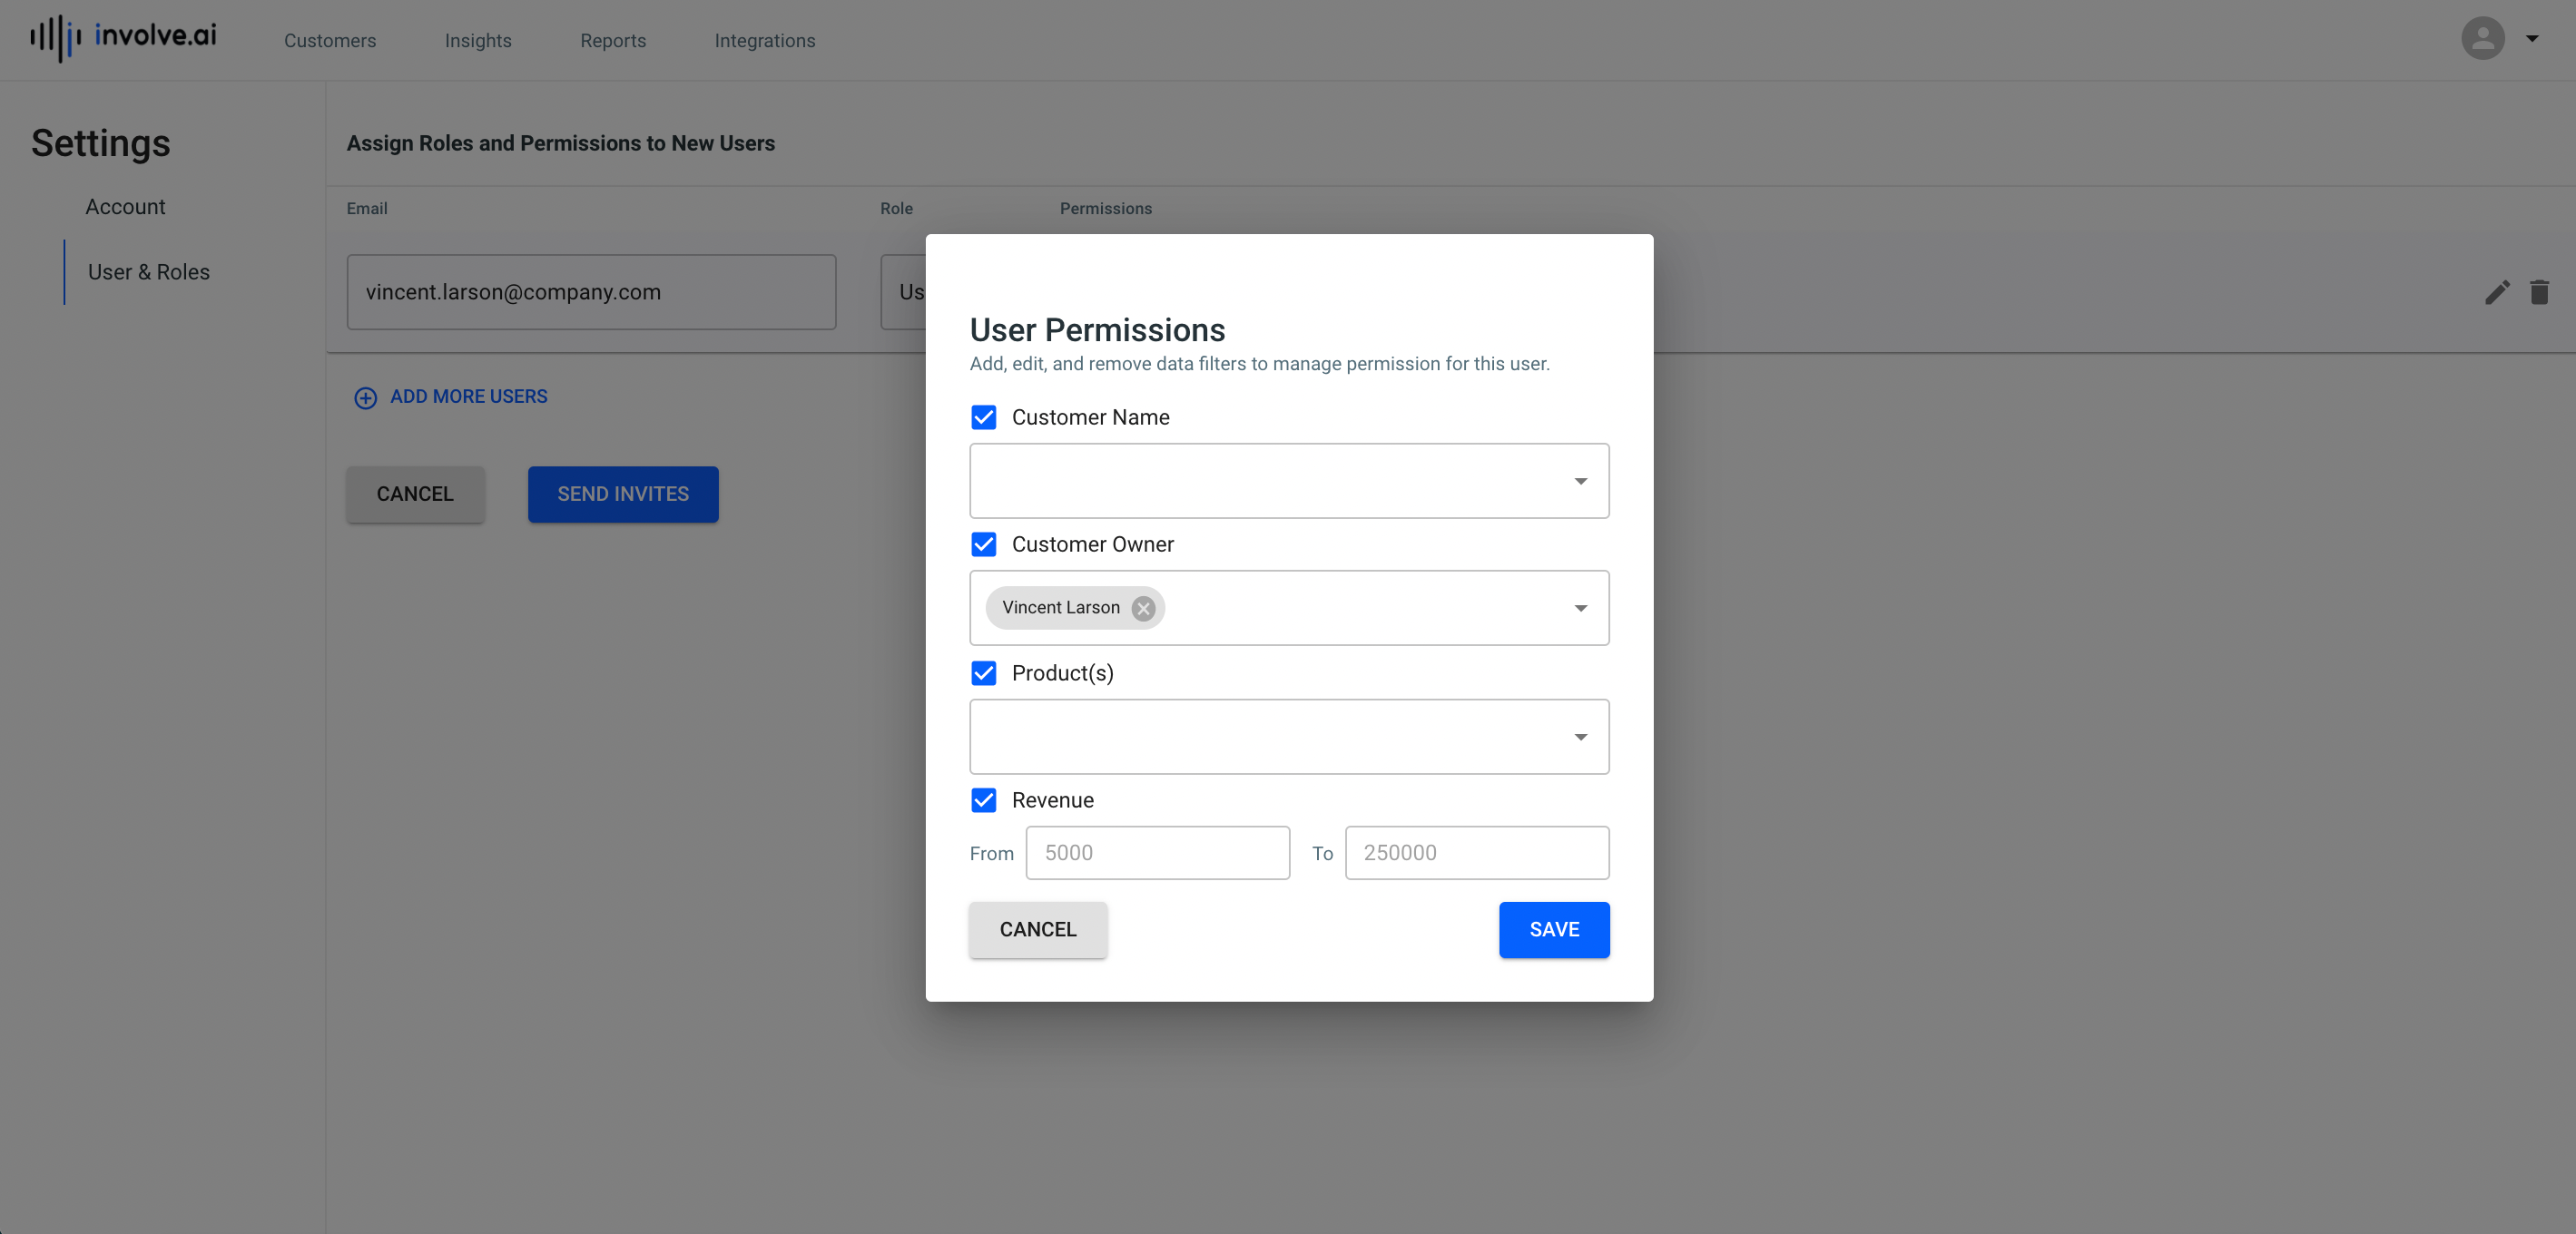
- Click on the Save button
- The Admin will be routed back to the Assign Roles and Permissions to New Users page. Click Send Invites button.

- The User will receive an invite shortly allowing them to log in to the involve.ai system
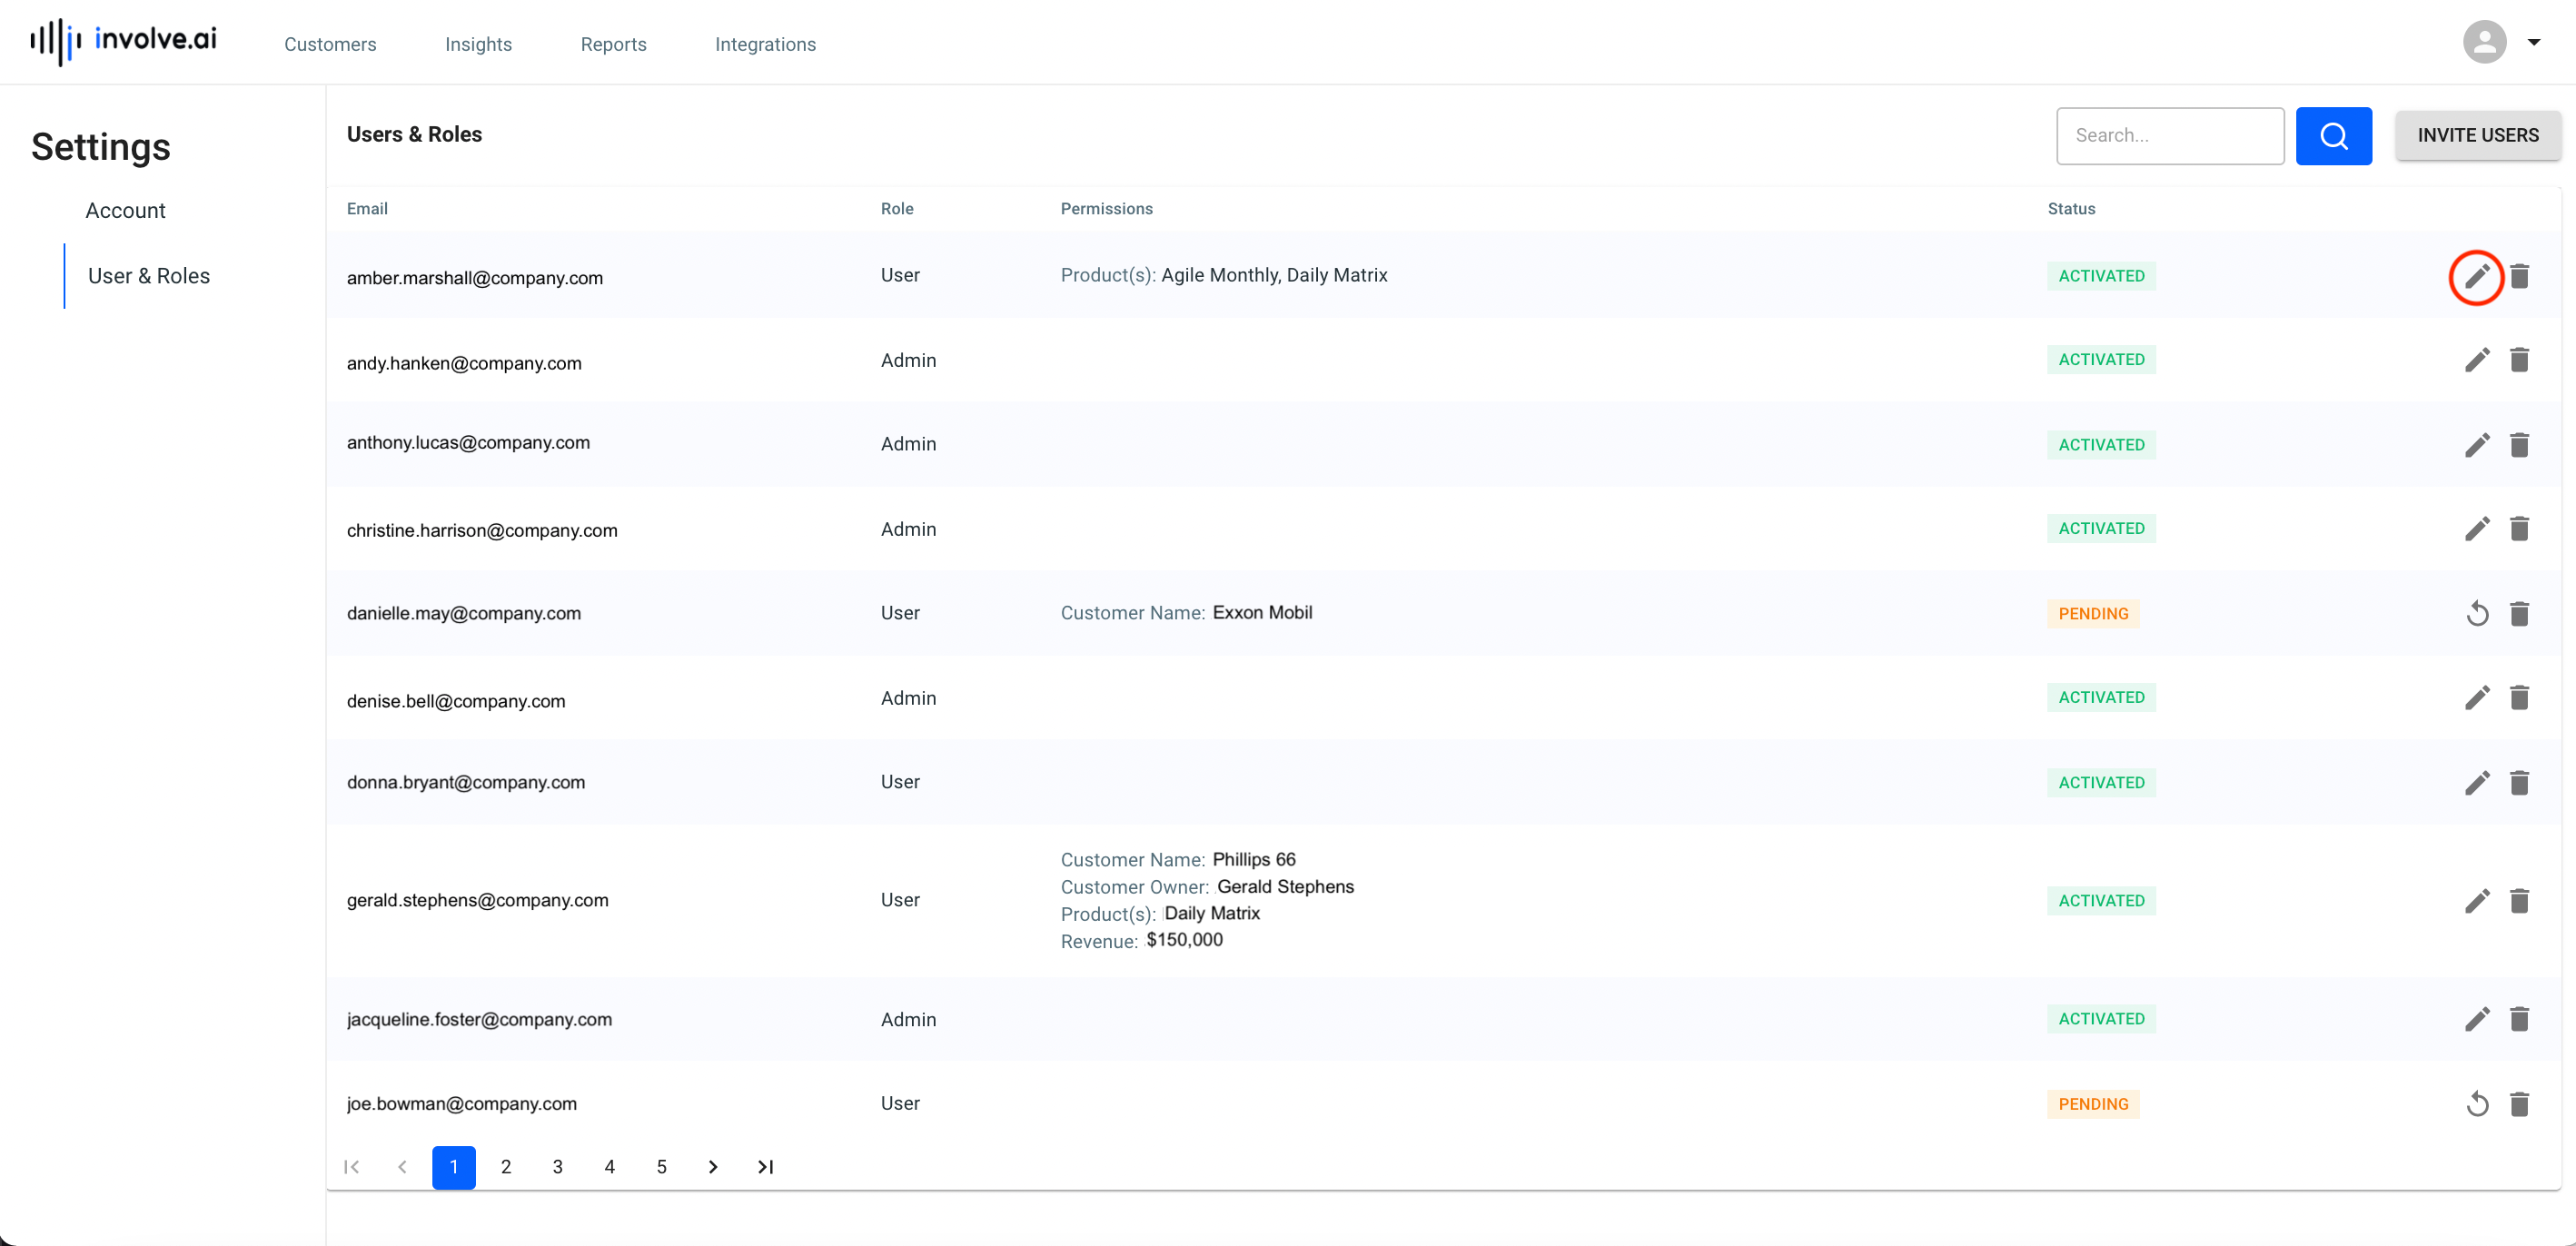
Edit or remove a user role
- On the Settings window, click on User & Roles
- At the end of each user row, there is a pencil icon and a trash can icon.
- Select the pencil icon to edit a user’s role.
- Select the trash can icon to remove a user from the platform.